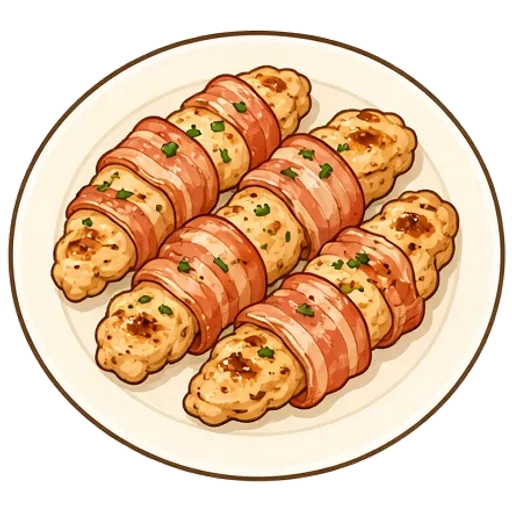
Bacon-wrapped chicken tenders
Juicy chicken tenders wrapped in bacon that roasts crisp around them, a dinner that tastes far fancier than the effort.
- 45 min total
- 15 min hands-on
- Anyone can make this
- Serves 2
- About $4.53 a serving
- 900 calories
- Good the next day
- Gluten-free
- Dairy-free

Dolly says: Make the full amount. It’s just as good for lunch the next day.
Ingredients
For 2 servings.
- 1 lb chicken tenderloins
- 10 slices bacon
From your pantry
- ½ tsp black pepper
Each serving has about 900 calories, 68 g protein, 1 g carbs and 68 g fat, and costs about $4.53 at typical US grocery prices. Both are estimates from what the recipe uses.
Missing something?
- No chicken tenderloins? Chicken breasts or boneless chicken thighs work.
Steps
Tap an underlined word for a quick explanation.
the oven to 425°F and line a with foil.
Preheat. Preheating means turning the oven on before you start, so it’s fully hot when the food goes in. Food that starts in a cold oven cooks unevenly and doesn’t brown the same.
How you’ll know: The oven beeps or its light clicks off, usually 10 to 15 minutes after you turn it on.
Sheet pan. A sheet pan is a flat metal baking tray with a low rim all the way around. The rim catches juices, and the wide surface lets food spread out and brown.
How you’ll know: Everything fits in one layer with a little space between the pieces.
the chicken tenders dry with paper towels and sprinkle them with the pepper.
Pat dry. Patting dry means pressing paper towels onto food to soak up the moisture on its surface. Wet food steams instead of browning, so this is how you get a good sear and crisp skin.
How you’ll know: The surface feels tacky, not wet, and the last paper towel comes away barely damp.
 Dolly’s tip: No salt needed. The bacon brings plenty.
Wrap one slice of bacon around each tender in a spiral, stretching it a little as you go, and tuck the ends underneath.
Dolly’s tip: Stretching thins the bacon so it crisps in the same time the chicken takes to cook.Lay them on the pan with the tucked ends down and a little space between each.
for 25 to 30 minutes, until the bacon is and and the thickest tender reads 165°F.
Roast. Roasting means cooking in a hot oven, around 400°F to 450°F, usually spread out on a sheet pan. The dry heat browns the outside and brings out sweetness, especially in vegetables.
How you’ll know: The edges are browned and a little crisp, and a fork slides easily into the thickest piece.
Brown. Browning means cooking until the outside turns brown, which is where a lot of savory flavor comes from. Give food room and time without stirring, or it steams and stays gray.
How you’ll know: The food looks brown rather than gray, and the kitchen smells toasty and savory.
Crispy. Crispy means the outside is dry, firm and crunchy. It comes from high heat, a little oil and room in the pan, because crowded food steams and goes soft.
How you’ll know: It sounds crunchy when you tap or bite it, and it doesn’t flop when you lift it.
Timer: 27 min 30 sec
Food safety: Chicken is done at 165°F in the thickest part. A thermometer is the only sure check. Without one, cut into the thickest piece: it should be white all the way through, with no pink.
for 2 minutes if the bacon still looks pale, watching the whole time, until .
Broil. Broiling means cooking under the oven’s top heating element, with strong heat from above. It browns and crisps the top in minutes, and it can burn fast, so stay close.
How you’ll know: The top bubbles and spots golden brown; check every minute and pull it before it blackens.
Crispy. Crispy means the outside is dry, firm and crunchy. It comes from high heat, a little oil and room in the pan, because crowded food steams and goes soft.
How you’ll know: It sounds crunchy when you tap or bite it, and it doesn’t flop when you lift it.
Timer: 2 min
Dolly’s tip: A broiler goes from golden to burnt in under a minute, so stay right by the oven.Food safety: Cook bacon until it’s crisp and no longer translucent.
Let them on the pan for 5 minutes, then serve.
Rest. Resting means letting cooked meat sit for a few minutes before you cut it. It keeps cooking gently, and more of the juice stays in the meat instead of running onto the board.
How you’ll know: Loosely covered with foil, it stays hot, and very little juice runs out when you slice it.
Timer: 5 min

Plan this in Dollop, and get the grocery list
Dollop puts this dinner on a night that suits your week, lists only what you still need to buy, and walks you through each step while you cook.